Ken Hada Drums at John Stamos’s House

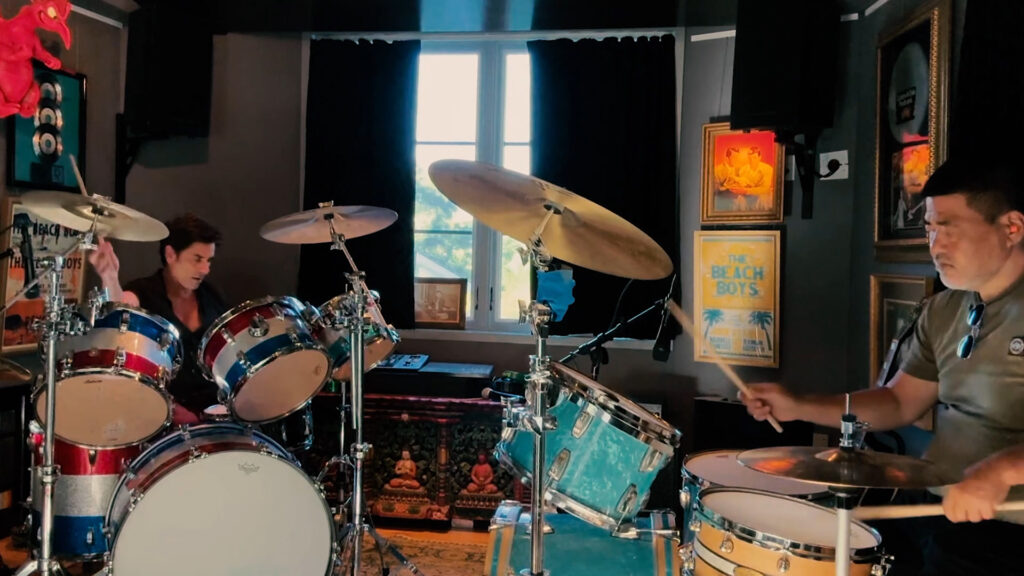
Ken Hada Drums at John Stamos’s House: 40 Years of Rhythm and Friendship.

Ken Hada Drums John Stamos drumming

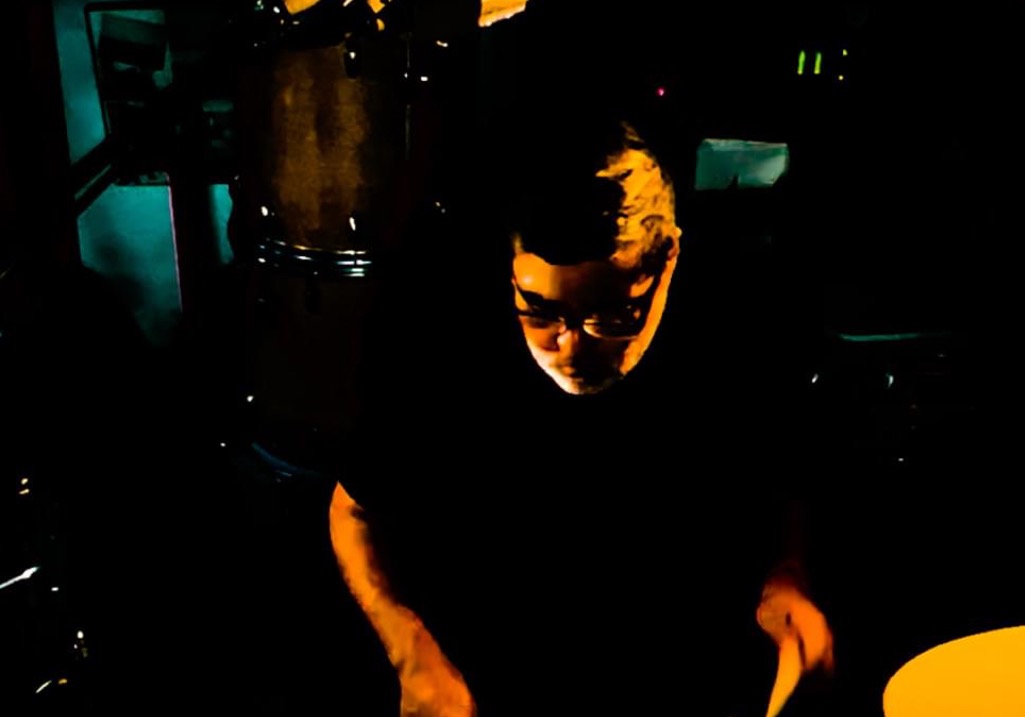
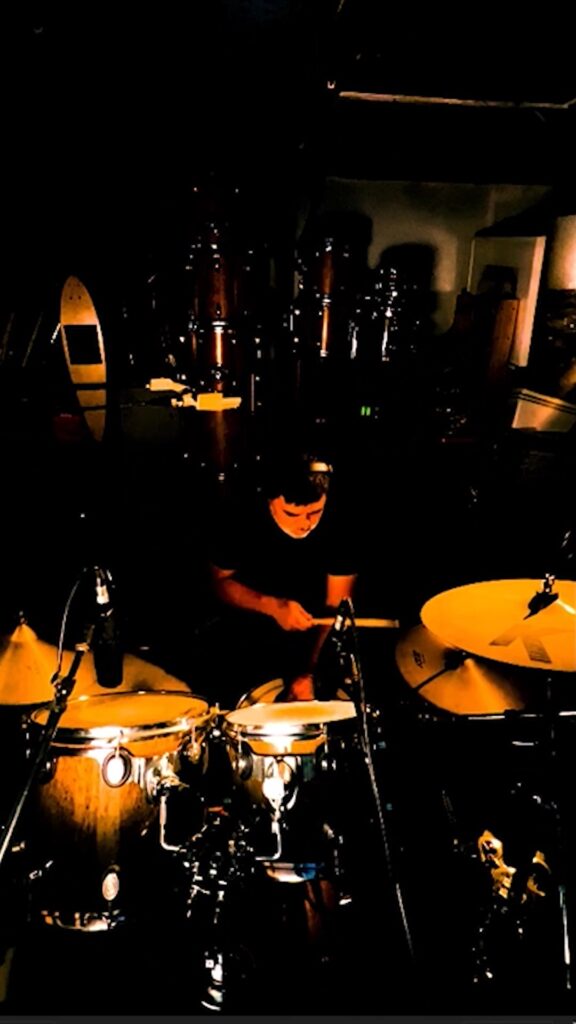
Join me in this special video as I reminisce on 40 years of drumming. With John Stamos, right from the comfort of his home! And guess what? We’re bringing the thunder with our Zildjian cymbals! From our first jam session in 1980 to the present day, it’s been an incredible journey.

Ken Hada Drums at John Stamos’s House

In this video, we’ll take you behind the scenes of our jam sessions at John’s house, where we’ve been helping each other’s drumming skills grow through dedicated practice and collaboration. You’ll also get a glimpse into our shared roots, as we reflect on our days playing drums in the marching band at Kennedy High in La Palma, California.

Get ready to witness the power of mutual support and camaraderie in music, as we blend our experiences from the marching band to the comfort of John’s home studio!

If you enjoyed this video, please give it a thumbs up and share it with your friends. And if you want to see more content like this, be sure to subscribe to my channel!

Thanks for joining us on this musical journey!

Drumming # JohnStamos # ZildjianCymbals # MusicLegends #KennedyHigh #MarchingBand

Ken Hada Drums at John Stamos's House
John Stamos and Ken Hada drumming

Mary Kissed The Ground

Mary Kissed The Ground, a musical memoir of my days in the Kennedy High School Marching Band. Transporting me back to the energy of the 1980s. I recall the creativity that fueled the genesis of this series of songs. Next, with both intuition and attention to detail, I crafted the arrangement and chords. Lastly, I will lay the foundation for what will evolve into my musical journey.

I recorded the basic tracks in the 1990’s. And capture the essence of my musical vision in its rawest form. I left out the words to save myself from facing them.

essentially 2 songs

“Mary Kissed the Ground” emerges as a multifaceted narrative, encapsulating two distinct chapters of my journey. The first part, a lyrical flight from Scotland to Ireland, embodies the boredom of intercontinental flight. The melody soars across vast expanses of sky, it carries the echoes of the band, color guard, and drill team. And that we were all moving farther away from our hometown.

In the second part, the focus shifts to the poignant moment of landing at Shannon Airport. Where a Drill Team officer kissing the ground serves as a poignant reminder of the transition. The transition from a world governed by rules to one defined by us. It wasn’t just time away from our home lives. It was time away from the world that formed us.

I originally this work “The Epic,” and later titled it “March.” Rooted in the shared experiences of the Kennedy High School Marching Band. These songs serve as a musical testament to the camaraderie and the spirit of adventure that unite us all.

“Mary Kissed The Ground” is but one chapter in this unfolding saga. Alongside other finished songs such as “Band Bus Ride,” “Parade,” and “5th Move.” Together, they form a symphony of memories. A melodic journey through the triumphs and tribulations of youth. Finally, a timeless testament to the enduring power of music to transcend time and space.

Mary Kissed The Ground
March is a collection of songs written and recorded by Ken Hada

Ken Hada Drums Ride Cymbals Compared

Ken Hada Drums Ride Cymbals Compared. Make A Thing Everyday Comparing some of my #ridecymbal. Greetings fellow drum enthusiasts! Today, I am thrilled to embark on a sonic journey through 3 ride cymbals. The inspiration for this exploration came unexpectedly from an old friend (Danny Gonzales) who, reached out with a simple yet intriguing request—to hear the sound of my Paiste 602 20 inch heavy ride cymbal. I’ve decided to create a comparison video featuring 3 of my rides, each possessing its own unique character and sonic identity.

Ride Cymbals Compared Paiste 20″ Heavy Ride

The Lineup:

In this sonic showcase, I’ll be shedding light on 3 of my rides. The star of the show, as per my friend’s inquiry, is the Paiste 602 20 inch heavy ride cymbal. Alongside it, we’ll delve into the distinct qualities of two other remarkable cymbals, creating a harmonious quartet of sound exploration.

The Comparison Videos:

The centerpiece of this venture is comparison videos, a musical feast for the ears where each ride cymbal takes center stage. By capturing the essence of their unique timbres, I aim to provide not just a visual spectacle but an auditory experience that allows you to discern the subtleties and nuances that make each ride cymbal stand out in its own right.

Ken Hada Drums Ride Cymbals Compared

Invitation to Explore:

As you embark on this auditory journey with me, I invite you to not only listen but actively participate. Share your thoughts, ask questions, and perhaps discover a new favorite among the ride cymbals featured. Drumming is not just a physical act but a sensory experience, and I hope this comparison provides you with a deeper appreciation for the diversity that exists within the realm of ride cymbals. So, without further ado, let the comparison begin!

And here is a link to my HiHat comparison

Ken Hada Drums my Hi Hats Compared

Ken Hada Drums my Hi Hats Compared Greetings fellow drum enthusiasts! Today, I am thrilled to embark on a sonic journey through my cherished collection of hi-hats. The inspiration for this exploration came from an old friend (Danny Gonzales) who, this morning, reached out with a simple request—to hear the mesmerizing sound of my Paiste 602 14-inch hi hats. This simple question ignited a spark of curiosity within me, prompting a closer examination of my entire hi-hat collection. In response, I’ve decided to create comparison videos featuring four of my favorite hi hats, each possessing its unique character and sonic identity.

Ken Hada Drums my Hi Hats Compared

Paiste 602 14 inch Hi Hat compared
Zildjian K/Z 14 inch Hi Hat compared
Zildjian New Beat 14 inch Hi Hat compared
Paiste Dark Energy 14 inch Hi Hat compared

The Lineup:

In this sonic showcase, I’ll be shedding light on four exceptional hi hats that have found a special place in my heart. In fact, the star of the show, as per my friend’s inquiry, is the iconic Paiste 602 14-inch hi hat. Alongside it, we’ll delve into the distinct qualities of three other remarkable cymbals, creating a harmonious quartet of sound exploration. In the end, we will listen to 2 Zildjian and 2 Paiste hi hats.

The Comparison Videos:

The centerpiece of this venture is comparison videos, a musical feast for the ears where each hi hat takes center stage.

Invitation to Explore:

As you embark on this auditory journey with me, I invite you to not only listen but actively participate. Share your thoughts, ask questions, and perhaps discover a new favorite among the hi hats featured. Drumming is not just a physical act but a sensory experience, and I hope this comparison provides you with a deeper appreciation for the diversity that exists within the realm of hi-hats. So, without further ado, let the comparison begin!

Put a photograph on your skateboard

Put a photograph on your skateboard. Yes, add a personal touch to your skateboard deck. This process combines elements of photography and hands-on craftsmanship, making it a popular choice among skateboard enthusiasts.

Put a photograph on your skateboard

To begin, the cyanotype printing method, an alternative photographic process that results in a cyan-blue print, is employed. This process typically involves coating a surface, in this case, watercolor paper, with a light-sensitive solution containing iron compounds. A photographic negative or image is then placed on the coated surface, and the assembly is exposed to UV light. The sunlight or a UV lamp reacts with the solution, creating a chemical reaction that produces the characteristic cyan-blue color. This method not only imparts a visually striking aesthetic to the skateboard but also makes use of a historical photographic technique.

Mixing Cyanotype
Coating Cyanotype
Sun Print Exposure

Following the cyanotype printing, the image transfer process comes into play. This involves carefully transferring the developed photograph onto the skateboard deck. The printed image is typically moistened and then pressed onto the deck, ensuring proper adhesion. This step requires precision to avoid distortions or imperfections in the transferred image.

Skateboarders often seek this customization to showcase their individuality and passion for both photography and skating. The combination of cyanotype printing and image transfer allows for the integration of personal photographs, turning the skateboard into a unique piece of art that reflects the skater’s identity.

As you’ve encountered interest from various skateboarders, it’s evident that this creative process resonates within the skating community. It not only transforms a skateboard into a personalized work of art but also serves as a conversation starter, fostering a sense of camaraderie among skateboard enthusiasts who share a common interest in both the visual arts and the exhilarating sport of skateboarding.

Taking shortcuts in your grip

The grip Murray Spivack taught me

Taking shortcuts in your grip can lead to not only shortcomings in your drumming skills but also the risk of injury. For drummers, the way you hold your drumsticks is a crucial aspect of your performance. A proper grip not only makes your drumming smoother and more effortless but also helps prevent potential injuries. Conversely, an incorrect grip can not only make even simple beats seem impossible to execute but also increase the risk of strain and injury. This is how Murray Spivack taught me to hold a drumstick.

Click here for more tips on drumming, click here for more drumming videos

Taking shortcuts in your grip leads to shortcuts in your drumming.

How to hold a drumstick

How Murray Spivack taught me drums

How Murray Spivack Taught Me drums through ‘Stick Control’ Many drum enthusiasts have delved into the timeless classic ‘Stick Control.’ However, Murray, a personal acquaintance of the book’s author, had a unique perspective on its teachings. He believed that most people approached it incorrectly. Regardless of whether his interpretation was deemed right or wrong, Murray’s approach to ‘Stick Control’ had a profound impact on my drumming journey and significantly improved my skills.

Stick Control Spivack Method Exercise 1

How Murray Spivack taught me drums

Stick Control Exercise 2-4

How Murray Spivack taught me drums
Ken Hada Drums

Things you will need to study Murray Spivack’s Drum Method (paid links)

Buy Stick Control

Metronome

Practice Pad

drumsticks

Selecting an ideal pair of drumsticks

Selecting an ideal pair of drumsticks for your drum lessons. This process is rooted in the Murray Spivack Method I went through. And Murray’s is not just about balance and size; it’s also about density. Murray’s deep teaching approach, emphasizes subtleties in pressure control and grip. I recommend choosing drumsticks with closely matched densities. This ensures that you can work on the nuanced variations in pressure. Which means the ability to hold or squeeze the drumstick with precision. The right density will allow you to explore these subtleties, enhancing your control over the instrument and refining your techniques. These drumsticks, carefully chosen for their consistent density, will serve as invaluable tools in your journey toward mastering hand control. Let’s embark on this rhythmic adventure together, armed with the perfect pair of sticks.”

If you are considering a drum lesson please understand a few things. The lessons I teach are not for the casual drummer. And the drummer that wants these lessons is one in a million. So unless you are all in, don’t contact me about lessons.

You can’t learn the drums if your drumsticks are not matched.

Selecting an ideal pair of drumsticks something you need to do

About Ken Hada

Make A Thing Everyday Double Ride Pattern

Make A Thing Everyday Double Ride Pattern. Introducing the Double Ride Pattern: a dynamic drumming technique that combines the rhythmic power of both the ride cymbal and hi-hat. Inspired and perfected by the renowned drummer John Wackerman, this beat brings a unique flavor to your drumming repertoire. With its intricate interplay between the crisp hi-hat and the resonant ride cymbal, the Double Ride Pattern adds depth and complexity to your rhythm, making your drumming style truly stand out. Whether you’re a seasoned drummer looking to expand your skills or a newcomer eager to explore new sounds, this pattern offers an exciting avenue to express your musical creativity. Join us in embracing the beat that John Wackerman has shared with the world and elevate your drumming to new heights with the Double Ride Pattern.

Make A Thing Everyday Double Ride Pattern

Make A Thing Everyday Double Ride Pattern

Ken Hada Drumming 513

Ken Hada Drumming 513. Arranging practice drum videos into songs offers a fantastic opportunity to improve your drumming skills while creating unique compositions. Regardless of your age, daily practice can have a profound impact on your drumming abilities and musical expression. Additionally, using video editing software as a stage can further enhance your experience and allow you to share your passion with others. Here’s a closer look at these aspects:

Ken Hada Drumming 513

The secret of success is showing up

  1. Practicing Drums Every Day: Consistent practice is key to becoming a skilled drummer. Set aside dedicated time each day to work on your technique, timing, and musicality.
  2. Arranging Practice Drum Videos into Songs: To transform your practice sessions into songs. Gives your drum practice another purpose or dimension.
  3. Being an Older Drummer: Age should never hinder your passion for drumming. As an older drummer, you bring a unique perspective and life experience to your playing. Embrace your journey and use your maturity to your advantage. Practice patience, maintain good physical health, and adapt your playing style to accommodate any physical limitations. Remember, it’s never too late to pursue your musical aspirations.
  4. Video Editing Software as a Stage: Utilize the interface of video editing software to transform your drumming videos into captivating performances. Experiment with different visual effects, transitions, and color grading to create an immersive experience for your viewers. Enhance the audio quality of your drumming by adjusting levels, applying EQ, and adding effects to ensure a professional and polished sound.

A pursuit is always in progress

By combining daily practice, arranging drum videos into songs, and leveraging video editing software, you can not only improve your drumming skills but also share your music with the world. Whether you’re a seasoned drummer or starting later in life, your passion for drumming knows no boundaries. Embrace the power of technology to create a virtual stage where you can showcase your talent and inspire others with your love for the drums. So, seize the opportunity, unleash your creativity, and let your drumming journey continue to flourish.